Cactus Con 2017

Cactus Con is a fun conference I have attended a few times in Phoenix. This was at the Phoenix convention center, and on saturday they have an event specifically for children / young adults (under 18) that want to get some cool info. Check them out –  2018 is slated for September 28-29.

https://www.cactuscon.com/

If you have kids – There are kid activities and CTF for hands-on learning!

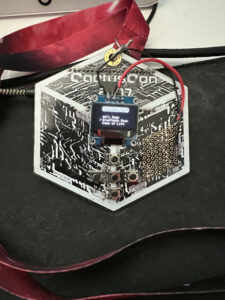
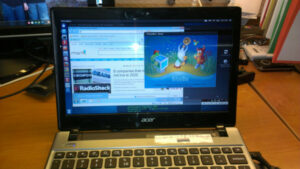
This was the 2017 electronic badge.  They sold out of badges before I could register in 2018 so hope to get one from some enterprising attendee.

Fun with Christmas Lights 2017

So I haven’t posted in a while, but here is something from last year around Christmas.

I started working with Light O Rama controllers so I could have a fun cool Christmas display.  The long story short is that I enjoyed doing the light show, and I want to do RGB LED lights, but there is a large cost I am not able to justify.  I think I will end up just using more LED lights (non-RGB) with standard controllers to help add more lights to my show at my home.  I want to do some fun arches but not sure if that will come to fruition in 2018 or not.

Here are a few videos of things I have done in 2017, and I want to work on some new songs in 2018 but it is time-consuming and I don\’t have a lot of time to sequence songs.  You can watch on YouTube for a full-screen view.

TSO – Wizards of Winter –

Pentatonix Come all Ye Faithful

Light of Christmas

I have a few more on my Youtube chan feel free to check it out.

This was 1 Light o Rama 16 chan controller and the software.  I set it up right around Thanksgiving of 2017.  Hoping to do more in 2018.

LED light bar for Joyner Sand Viper 250 Installation

The installation of the LED light Bar is pretty simple.  The only tough part is figuring if you are going to hook up other lights with it 🙂  My kids and I decided we were going to do some fun LED lights on the interior as well as the LED light bar.  The below are the two items purchased to make this work, the 3rd item is optional and may not be technically legal in your state.  Please review your local regulations if this is permitted.

Amazon for LED light bar (whatever fits your ride), Toggle Switch (amazon again pick what you like), and internal LED lights for the buggy.

I had some wire, connectors and some wire conduit to run the wires so pretty much was good to go.  Simple problem to figure out was the switch didn’t show + / – or load so you know what you connect up but with a nice 9V battery I was able to figure it out on an LED strip.  Once this was figured out it was more about placement and then running wires to the battery or switch for lights.  Since I wanted this to be separate so I can turn it on and off without messing with the main lights I wired it inline with a fuse to the battery.  Caveat here is only run the lights when the Joyner Sand Viper 250 is running or else you could easily drain the battery.

*PLEASE NOTE* This instruction set is for educational purposes only.  If you follow these instructions and something bad happens to LED light bar, Joyner Sand Viper, or whatever you are hooking this up to, you will need to contact your warranty center for support.  There is no written guarantee or warranty implied or inferred with this instruction set.  Use at your own risk.

The basic installation guide is this –

  • Find out where you want to mount it.
  • Mark Pilot hole locations.
  • Drill through the top frame and continue through the single piece so you can bolt on the mounts for the LED light.  Depending on your drill and bits you might be able to go to the right size immediately, I had to drill a pilot then expand it with a larger drill bit.
  • Secure the mount with a large enough bolt and securing nut.  I had to purchase something that did not come with the kit at a local hardware store.
  • Adjust the light to your desired viewing position (guess and adjust at night).
  • Run wires to the appropriate Ground and load for your switch.
  • Run wires for your switch to your battery.
  • Add inline fuse for your battery so you don\’t ruin a brand new LED light bar 🙂
  • Wait for night and enjoy!!

Here is a quick view of what it looks like from a quick view.  I don’t have an HD Go pro to give you a riding POV however eventually I might get one or use a different HD camera to give that vantage point.

https://www.youtube.com/watch?v=rDYmGi_SB8s


Cinders OHV

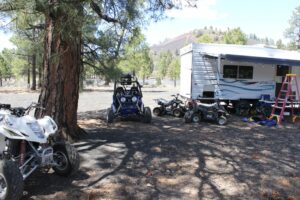
Having a Toy Hauler is great! Being able to use it is even better!  Recently we were able to go up to Flagstaff\’s OHV area the Cinder Pit and going during an off peak time meant less people and more room for us!  We were able to spread way out and enjoy the beautiful weather and outdoors!

Here is the view of the main mountain most people go up and down at the Cinders.  There are a ton of back road trails too.  The only place where you don\’t have to stay on a trail and just go wherever you want!

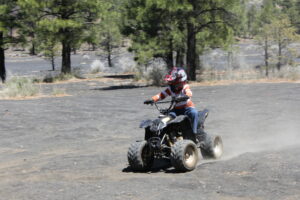
Some riding on the quad 🙂

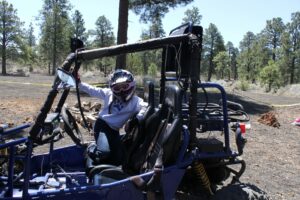
Someone wanted to go on a ride while I was still installing a light bar lol!


Next trip will be fishing… hopefully we will catch something 🙂

Random Thought for the day – Xbox 360 Kinect Just Dance 4 and JDTV

Not sure how many people actually know this (I would guess most since it says upload to JDTV on the Xbox 360), but when you finish dancing at Just Dance 4 for the Xbox you get to see / edit a video of yourself.  When finishing you can upload to the Just Dance TV station for all other Just Dance 4 gamers to watch / see and like or laugh at.  If you share the video others can view and see your video from the game and from the interwebz.

Since I have two younger children, and my account has the live subscription, I put a pin to use my account (same way you can put a pin for restricting types of games / video content).  With this I do not have to type out my entire password to use it just a quick pin, which is very convenient as long as the kids don\’t watch my hands.  You can use the Kinect and a hand to click your password on the screen but that kind of defeats the purpose really don\’t you think Microsoft??

But I digress… that\’s security and parental controls.. back to the game and the Just Dance TV station…

There are a lot of videos of people on the Just Dance TV, many of which are with people that are dressed in PJ\’s and sleeping attire that you probably would not typically post a video of you dancing to the world with.  So is it that people just do not realize that when they say upload it to Just Dance TV means uploading it similarly to a youtube style review or you can even view it from your PC – http://justdancetv.ubi.com/en-US/xbox/home  .  Another option is you can log in with Facebook and post it there to your friends only, or post with the world and let everyone see you.  My guess is that your video will be shared as a link to their server if you tweet / fb post or G+ it since I had a public video, which I then unshared, but I can still get to as long as I know the URL.

My random thought for the day is – Do you know that you are posting your Just Dance 4 Videos (that you share to Just Dance TV) to the world for all to see?  With some of the favorites you can easily tell since they are dressed up as Darth Vader and a couple of storm troopers all the way to Duffman.  If you know that it is going to the interwebz for all to see great and more power to you… however I am SURE there are a large amount of users not realizing just how far reaching the Just Dance TV network goes.

With Xbox 360 Gamertag\’s been hijacked you should also think about using a different username for your ubisoft account versus your Xbox 360 live Gamertag.  Just a side note.

Finding your Video on the interwebz –

If you are someone that has a lot of likes and views you can go to the most popular area and search around.  I thought another way would be to searching the autodance number, autodance number plus country but it did not seem to work properly.  I am guessing you can do a quick search for yourself but it is probably faster by logging on to your account and viewing your shared videos.   If you want to find your videos you have to log on to your ubisoft account and go under your channel.  There you can see links directly to your videos that you have shared and then you can copy / paste the url at the top to post to Facebook / G+ / Twitter (why would you tweet this?).

Closing thoughts

So if you have the game Just Dance 4 for xbox 360 and kinect and do NOT want your video\’s up on the web you save the video but not post it online.  If you do post it you could try facebook for the application add on but I would not give my facebook info to a third party application.


Acer C7 Mostly Working Virtual Box 4.1.12 in Chrubuntu 12.04

Trying to get Virtual Box 4.1.12 from the software center is not a basic download and run.  You can download it, you can run it but when you try to start a machine you create it crashes… always.

*PLEASE NOTE* This instruction set is for educational purposes only.  If you follow these instructions and something bad happens to your computer you will need to contact your support staff / warranty center for support.  There is no written guarantee or warranty implied or inferred with this instruction set.  Use at your own risk.

If you too are having this issue I found someone who posted a way to make VirtualBox  mostly work in Chrubuntu for the Acer C7.

Steps –

  1. Install Chrubuntu on Acer C7 if you haven\’t already.
  2. From a shell in chrubuntu run

wget http://www.cisgendered.com/~keyvin/virtualbox-kernel-mods-3.4.0.deb
sudo dpkg -i virtualbox-kernel-mods-3.4.0.deb

Thank you to – Keyvin and his website http://www.cisgendered.com/?p=24 for his work.


Chromebook C-7 Running Ubuntu 12.04

I finally got my hands on a Chromebook in November of 2012.  I enjoyed the idea of a quick simple PC and wanted to get one for myself so I did.  I purchased an Acer C7 Chromebook.  But not just to run ChromeOS, I wanted it to be a multi-boot machine so I could do various things in different OS\’s on a very nice and slim platform for portability.

I was able to find enough information to make this work, now I want to share with anyone else that might want to get this working on their Acer C7 as well.

First things first – Many people put a lot of time and effort into making this work so all credit and accolades are due to them.  Secondly *PLEASE NOTE* This instruction set is for educational purposes only.  If you follow these instructions and something bad happens to your computer you will need to contact your support staff / warranty center for support.  There is no written guarantee or warranty implied or inferred with this instruction set.  Use at your own risk.

This write up is for an Acer C7 only – Not sure if it will work with other models.

The creator of Chrubuntu has a great step by step setup on how to install Chrubuntu on your Acer C7. *A word of caution* Create a backup USB or SD card so you can revert back if you need to.  Minimum 4GB SD / USB card required  I had to use it twice and it made for a quick restore and start over. Full Recovery info and quick info is boot in to ChromeOS – open chrome://imageburner in your browser and follow the steps. You can download the windows image creator or mac image creator if needed as well so they have multiple ways to get you back to square one.

After you create the backup usb you need to enable Developer Mode on the Acer C7.

To enable developer mode you need to do the following –

  1. Backup any files you have on the C7 locally on the drive.
  2. Power down Acer C7.
  3. Push the esc +F3 (refresh key).  While holding those buttons push the Power button to turn the C7 on.
  4. A screen shows up a Chrome OS is missing or damaged (this is what you want).
  5. Press ctrl+d to boot into developer mode.
  6. The screen will say press ENTER to turn OS verification off.
  7. Press Enter.
  8. It will reboot the machine.
  9. At this point until you change it your Chromebook will always boot into OS Verification is off screen.
  10. You can either wait 30 seconds (it will beep twice at you ) then boot or you can push ctrl+d to immediately boot.
  11. The first time you run into Developer Mode it will actually transition your system to Developer Mode – *This will delete your local files if you have any on the chromebook*
  12. Now you are in Developer mode the instructions from Jay Lee will now work.

Once your Acer C7 is in developer mode you now need to go Here for how to install Chrubuntu.  JayLee has a donate button so throw him some money if you actually use the code to help pay for random stuff.

Once you have chrubuntu installed and are inside Chrubuntu you can set it up to always boot into Chrubuntu or vise versa.

To boot into ChromeOS from Chrubuntu.

  • In Chrubuntu type sudo cgpt add -i 6 -P 0 -S 1 /dev/sda (That is a ZERO after P) to boot into Chrome OS in a terminal window
  • password for sudo is user if you did not create one via passwd method.
  • reboot into Chrome OS

To get into Chrubuntu from Chrome –

  • Before you log on to Chrome push ctrl+alt+f2 to get into developer console
  • Login – chronos
  • type in  sudo cgpt add -i 6 -P 5 -S 1 /dev/sda This will boot into Chrubuntu always until you change it.
  • type exit.
  • ctrl+alt+f1 (go back to login screen for chromeos)
  • Power down.
  • Power back up and it should boot into Chrubuntu.

A very good video going to developer mode, to installing Chrubuntu on an Acer C7 is on youtube Here  Just do this for the wget command instead – wget http://goo.gl/tnyga; sudo bash tnyga

Fun with Virtualbox and Error with 64bit Hardware Acceleration on Lenovo T420

So I was having some fun installing Virtual box on my Backtrack 5 R3 install on a new SSD that I am running for a laptop of mine and found an interesting error.

error: “VT-x/AMD-V hardware acceleration has been enabled, but is not operational. Your 64-bit guest will fail to detect a 64-bit CPU and will not be able to boot. Please ensure that you have enabled VT-x/AMD-V properly in the BIOS of your host computer.”

So this error is simply telling me to enable hardware acceleration in my Bios.  For me I am running this on a IBM Thinkpad Lenovo T420 so I went in and changed the setting.

*PLEASE NOTE* This instruction set is for educational purposes only.  If you follow these instructions and something bad happens to your computer you will need to contact your support staff / warranty center for support.  There is no written guarantee or warranty implied or inferred with this instruction set.  Use at your own risk.

To fix this I did the following:

  • Restarted IBM T420 laptop.
  • Pushed Blue Thinkvantage button when told to do so.
  • Pushed F1 for Bios.
  • Right arrow over to Security Tab
  • Down arrow to Virtualization and pushed the enter key
  • Hit enter on the Intel Virtualization Technology – A Blue Box will appear
  • Down arrow to Enabled, hit Enter. (Enabled should be highlighted in white.)
  • Down Arrow to Intel VT-d Feature and hit enter.
  • a Blue box will appear and down arrow to Enabled (Enabled should highlight white) and hit enter.
  • Push F10 to save and exit.

When I rebooted into Backtrack and ran Virtualbox I was able to install my 64Bit Win7 machine as well as other 64bit OS\’s 🙂

Enjoy.

Kevin

Getting Virtualbox running on Backtrack 5 R3 Gnome

For fun (and obvious reasons for being able to take snapshots) I wanted to run virtualbox on my Backtrack 5 R3 64bit Gnome setup.  I did the standard looking for it by doing – sudo apt-get update; sudo apt-get install virtualbox-4.0 and getting an error was kind of what I thought would get.

Google being my friend (or Bing if you like that) I came across a post and quick video –

http://netsecuritystuff.wordpress.com/2011/05/23/virtualbox-on-backtrack-5/


and a video here –

http://www.youtube.com/watch?v=en7O-LLrmxc


Both of which are essentially telling you to do the same thing (one with just CLI from the webpage) and the other by navigation via the video and Command Line Interface.  So whichever method you prefer; CLI worked for me.

*PLEASE NOTE* This instruction set is for educational purposes only.  If you follow these instructions and something bad happens to your computer you will need to contact your support staff / warranty center for support.  There is no written guarantee or warranty implied or inferred with this instruction set.  Use at your own risk.

The netsecurity link advises to update kernel headers

# prepare-kernel-sources
# cd /usr/src/linux
# cp -rf include/generated/*include/linux                  *Note this step did not work for me*

Then edit your /etc/apt/sources.list file to include the debian luicid non-free list

Via Command line –
#  echo deb http://download.virtualbox.org/virtualbox/debian lucid contrib non-free >> /etc/apt/sources.list

or navigate via the folders and edit the file directly and paste –  deb http://download.virtualbox.org/virtualbox/debian lucid contrib non-free

wget -q http://download.virtualbox.org/virtualbox/debian/oracle_vbox.asc -O- | sudo apt-key add –

Do an update

#apt-get update

search for virtualbox within your repository

#apt-cache search virtualbox      *this was handy to see if what I was doing was working right*

#apt-get install virtualbox-4.0

*Note* once I installed 4.0 it said there was a new version available and well just wanting to run / test it out seems to work fine.  I am running Virtualbox 4.0 on my Backtrack 5 R3 Gnome version with 64bit without an issue.  However I could have installed the newer version of virtualbox-4.2 just to be more up to date.. but I didnt want to 🙂

100% of the credit goes out to the author at –

http://netsecuritystuff.wordpress.com/2011/05/23/virtualbox-on-backtrack-5/

and the video is nice if you want to see what you should do but I was able to do the instructions via the command line with no issues.

Enjoy

and as Armitage says – Happy hunting!

🙂

Kevin


New Toy :-)

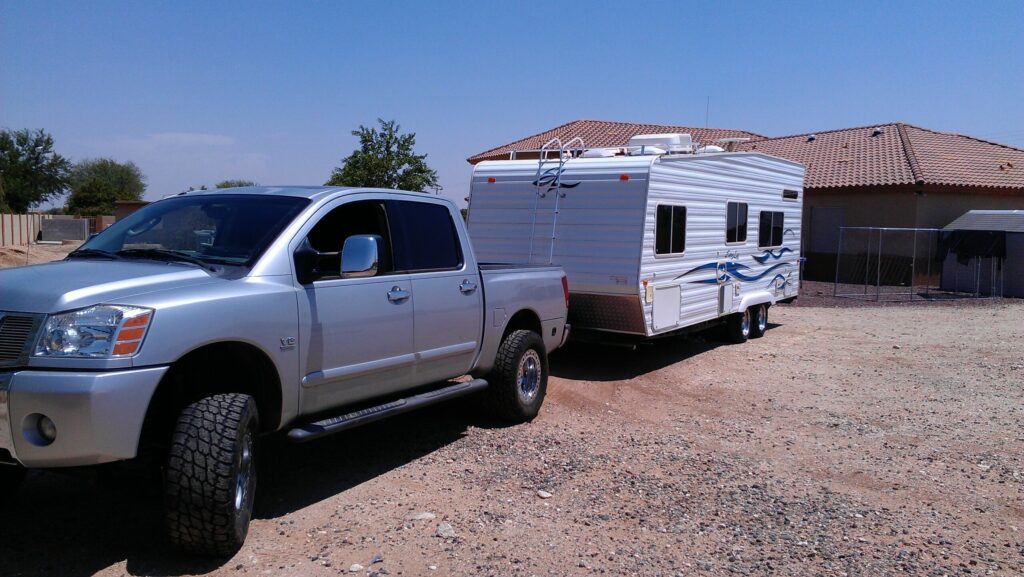
Literally, it is a Toy Hauler!  Just purchased and parked in the backyard 🙂  It is a 2005 Weekend Warrior FS2300 and I got a decent price on it (in the market for a 1/2 ton towable toy hauler) so I am super excited to go on the road with the kids!  Some fishing, maybe the dunes, oh and hit up some of the national parks maybe?  I hope to upgrade the truck to a nice diesel in the future (who knows when) and make towing even that much more fun.  Too bad Nissan didn\’t go with a diesel Titan..

Doing research there are a few issues with the WW (weekend warrior) FS2300\’s.  From the great guys at RV.NET (BTW nice place to meet some peeps) you need to look out for a few things –

So when looking at a used Toy Hauler these are important things to note 🙂  Lots of links to go over that stuff and the fridge you can check with your phone if you like.  We got ownership, titled, and now ready to get some basic maintenance done and figure out what does and doesn\’t work.

Found a problem with the Iota DLS 30 converter/charger and a fuse being blown.  Couldnt figure out why the manual says fuses when I can only fit 1 fuse in (I will be asking the service guys about that).  There was a fuse blown on the fridge so the AC panel didnt light up but after a few hours of looking I got the fuse and was able to replace it.  The fuse on the Rampage Radio also was blown.  I bought a cheap radio unit to replace it but for some reason it didnt work … dang walmart radio.  Found another glass fuse for the radio and it works now… I still want to swap it out.

Got the kids out there to help clean up the trailer while I was working on wires and fixing things.  They were much happier once the radio was on and they didnt seem to mind the 102 temp inside the trailer with the music.  One of the speakers doesnt seem to work so I will eventually get that replaced but not now 🙂

Well this is the joy\’s of owning second hand stuff; you hope it all works and when it doesn\’t you hope that you have enough ability to fix it.  Thanks to the interwebz I am certainly armed better than without it!

I have an appointment to repack the bearings but I might be figuring out how to do this on my own in the future… Seems expensive.

So if you buy a toy hauler  – check everything out that you can and if not just look for the fuse, fuse box, or fuse behind the door you cant see :-).

Kevin

Toy Hauler

Toy Hauler